%201.svg)


Plano's Quick Start: Setting Up Your Nest Thermostat
November 3, 2025
Why Plano Homeowners Are Making the Switch to Smart Thermostats
Nest thermostat setup plano is straightforward, but following the right steps ensures your system works perfectly. If you want to cut energy costs during Plano's hot summers or gain better control over your home's comfort, upgrading to a Nest thermostat is a smart move.
Quick Start Guide for Nest Thermostat Setup in Plano:
- Turn off power at your circuit breaker for safety.
- Take a photo of your old thermostat's wiring.
- Check compatibility with Google's online tool at nest.com/work.
- Install the Nest base and connect wires.
- Attach the display and restore power.
- Complete on-screen setup and connect to Wi-Fi.
- Test your system to ensure it responds correctly.
The typical installation takes just 30-60 minutes.
Texas homeowners who switch to a Nest thermostat often see cooling cost savings of around 15%, with some reporting up to a 20% reduction in total heating and cooling bills. That's real money back in your pocket, which adds up quickly when battling the Plano heat.
Beyond savings, a Nest thermostat learns your preferences, adjusts automatically when you're away, and gives you complete control from your smartphone. This guide covers everything from compatibility checks to final setup and helps you decide between DIY and professional installation.

Why Upgrade to a Nest Thermostat in Your Plano Home?
Plano's scorching summers mean your AC runs nonstop, leading to high energy bills. Upgrading to a Nest thermostat setup Plano homeowners recommend is a smart investment that transforms how you manage your home's climate, often paying for itself in months.
The real magic is energy efficiency. Nest thermostats can lower heating and cooling bills by up to 20%. In a climate like Plano's, those savings add up fast. You can find more statistics on energy savings on our thermostat installation page.
Here's how it saves you money:
- The Nest Learning Thermostat automatically creates a schedule based on your habits. While only 11% of traditional programmable thermostats are set to save energy, Nest does the work for you, delivering actual results.
- Home/Away Assist uses sensors and your phone's location to know when the house is empty, switching to an energy-saving Eco Temperature. This feature alone can significantly lower your bill during Plano's peak summer demand.
- Remote control via the Nest app gives you complete control from anywhere with Wi-Fi. Adjust your thermostat from a meeting or on your way home so you always arrive to a comfortable house.
- Energy History reports provide actionable insights into your usage patterns, helping you make smarter decisions. The app even displays a leaf icon to reward energy-efficient choices.
- Smart home integration allows your Nest to work seamlessly with Google Home or Alexa for voice control and a connected home experience.
Your Nest thermostat also thinks ahead, monitoring indoor activity and local weather forecasts to pre-cool your home during cheaper off-peak hours. It acts as the intelligent brain of your HVAC system, making countless small adjustments to maximize comfort and savings.
Before You Begin: Compatibility and Preparation
Before starting your nest thermostat setup plano project, a few minutes of preparation can save hours of headaches. Let's cover compatibility and tools.

HVAC System Compatibility
Nest thermostats are compatible with most modern HVAC systems, but not all. Checking compatibility before you buy is essential. Use Google's online compatibility checker by answering a few questions about your current wiring.
Two key concerns are:
- High-voltage systems: Standard Nest thermostats are not compatible with 120V or 240V systems (identified by thick wires). These are dangerous to work with and require a professional.
- The C-wire (common wire): This wire provides continuous power. While some Nest models can work without one, a C-wire ensures reliable performance and avoids issues like a flickering display or poor Wi-Fi connectivity. You can check for a C-wire when you remove your old thermostat.
Wi-Fi Connection
Your Nest needs a solid Wi-Fi connection for its smart features, including remote control, learning, and energy reports. Ensure the signal is strong at your thermostat's location before you begin installation.
Tools Needed for Installation
Nest includes most of what you need in the box: a screwdriver, wire labels, mounting screws, and wall anchors. Many packages also include an optional trim plate to cover marks left by your old thermostat.
You will also need your smartphone or tablet for the setup process. A small level is helpful for ensuring the thermostat is straight. Having everything ready makes the nest thermostat setup plano process much smoother.
Step-by-Step Guide to Your Nest Thermostat Setup in Plano
This section provides a detailed walkthrough for a standard installation, so you can confidently complete your Nest thermostat setup plano.

Step 1: Power Down Your HVAC System
Safety first: always cut power to your HVAC system before touching any wiring. Go to your home's electrical panel and find the breaker labeled "Furnace," "AC," or "HVAC." Flip it to the "OFF" position. Verify the power is off by trying to adjust your old thermostat; if nothing happens, you're safe to proceed.
Step 2: Remove the Old Thermostat and Document Wiring
This critical step will save you troubleshooting time later. Gently remove the faceplate from your old thermostat. Before touching any wires, take a clear photo of the connections. Use the included labels to mark each wire according to its terminal (R, C, Y, etc.). Once labeled, disconnect the wires and unscrew the old base plate from the wall.
Step 3: Install the New Nest Base and Trim Plate

Now, mount the new Nest base. Use the optional trim plate to cover any marks or holes left by the old thermostat. Use a level to ensure the base is straight, then mark the screw holes and secure it to the wall with the provided screws and anchors. The base should feel solid.
Step 4: Connect the Wires to the Nest
Using your photo and labels, connect the wires to the matching terminals on the Nest base. Press the button above a terminal, insert the wire fully, and release. Gently tug each wire to confirm a secure connection. Once all wires are connected, tuck any excess wiring back into the wall.
Step 5: Attach the Display and Restore Power

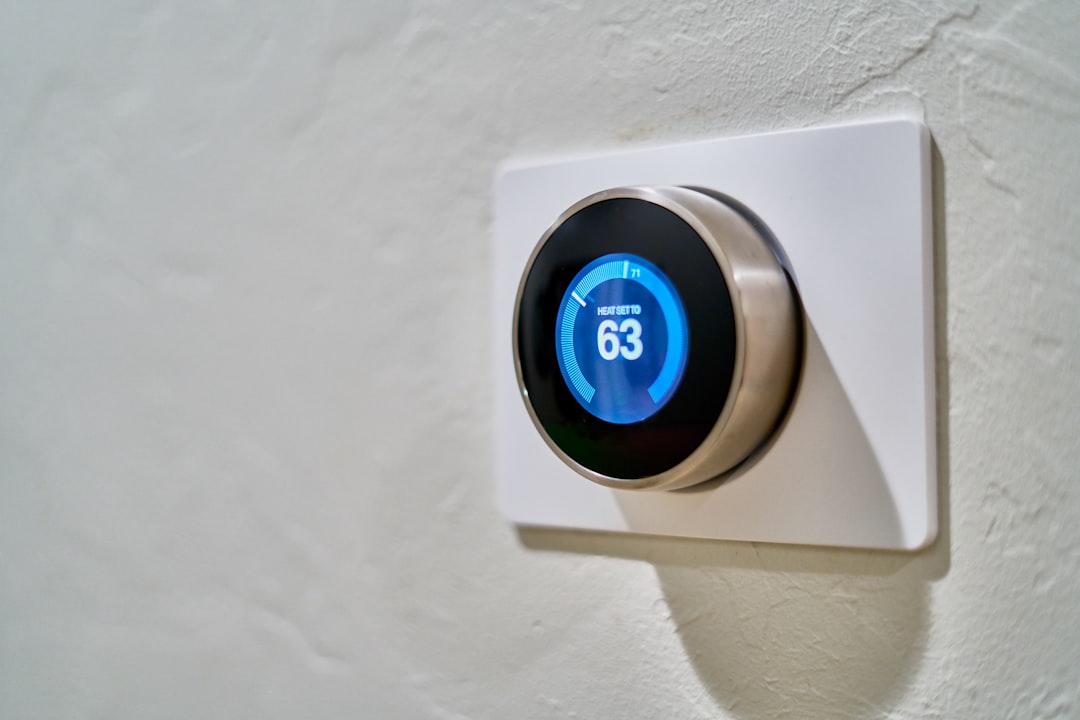
Align the Nest display with the base and push it on until it clicks securely into place. Go back to your electrical panel and flip the breaker back to the "ON" position. Your Nest should now power on.
Step 6: Complete the On-Screen Setup
The Nest will greet you with a welcome screen and guide you through the setup. You will:
- Select your language.
- Connect to your home's Wi-Fi network.
- Enter your ZIP code for local weather data.
- Configure your HVAC system settings (verify any auto-detected settings).
- Test your heating and cooling to ensure everything works correctly.
Congratulations! Your Nest thermostat setup plano is complete. If you ran into issues or prefer a professional touch, our team can help with Thermostat Installation & Setup Services in Plano, TX.
Professional vs. DIY Nest Thermostat Installation
Decided to upgrade to a Nest? Great! The next question is whether to DIY the nest thermostat setup plano or hire a professional. The right choice depends on your comfort with wiring, your HVAC system's complexity, and your desire for guaranteed results.
The Case for DIY Nest Thermostat Setup in Plano
There's a deep satisfaction in completing a home improvement project yourself. A DIY installation is a great option if you:
- Enjoy following step-by-step instructions.
- Have basic wiring knowledge and feel comfortable with simple electrical tasks.
- Have a simple HVAC system (e.g., single-stage heating and cooling).
For straightforward systems, a DIY installation can take as little as 30 minutes.
Why Plano Homeowners Often Choose Professional Nest Thermostat Setup
However, many Plano homeowners wisely choose professional installation for good reason:
- Complex HVAC Systems: Homes with heat pumps, multi-stage equipment, or zoned systems have complicated wiring. A professional ensures correct configuration to prevent damage and optimize performance.
- The C-wire Situation: Many older homes lack a C-wire, which is needed for the most reliable performance. A technician can easily install one if necessary.
- Safety and Peace of Mind: Professionals follow strict safety protocols and guarantee the wiring is correct, protecting your investment and giving you peace of mind.
- Time-Saving: We handle the job efficiently, including testing and troubleshooting, freeing up your valuable time.
- Expert Advice: Our technicians provide a personalized tutorial, showing you how to maximize savings and use all of your Nest's features.
While DIY is feasible for some, choosing Elite Air Texas for your nest thermostat setup plano ensures expertise, safety, and reliability. Ready for a perfect installation? Visit our Professional Thermostat Installation Services in Plano, TX page.
Frequently Asked Questions about Nest Thermostats
Here are answers to the most common questions we hear from Plano homeowners about Nest thermostats.
Will a Nest Thermostat work without a Wi-Fi connection?
Yes, your Nest thermostat will function without Wi-Fi as a standard thermostat, allowing you to adjust the temperature manually. However, without an internet connection, you lose all the smart features that provide convenience and energy savings, such as remote control, learning schedules, Home/Away Assist, and energy reports.
How long does a typical Nest installation take?
A standard DIY installation typically takes around 30-60 minutes for a straightforward system. Professional installation often falls within the same timeframe, but with the added benefit of an expert ensuring correct wiring, optimal configuration, and thorough testing. The real time-saver with professional help is avoiding potential troubleshooting and do-overs.
Can a Nest Thermostat control a multi-zone HVAC system?
Yes, Nest thermostats work very well with multi-zone HVAC systems. The setup requires one Nest thermostat for each zone you want to control independently. For example, a two-zone system (upstairs/downstairs) would need two Nests. All thermostats can be managed through the Google Home app, giving you a complete view of your home's comfort. Since multi-zone wiring can be complex, many homeowners opt for professional installation.
Conclusion
Upgrading to a Nest thermostat is about taking control of your energy bills and enhancing your comfort, especially during Plano's hot summers. The benefits are clear: energy savings of 10-20% annually, remote control convenience, and a smart system that learns your preferences to create a perfectly comfortable home.
Whether you choose a DIY Nest thermostat setup plano or prefer the peace of mind of professional installation, you're making a smart investment in your home's efficiency.
For those who want it done right the first time, our certified experts at Elite Air Texas are here to help. We guarantee a flawless installation with optimal configuration and a full walkthrough of your Nest's features. We've installed countless smart thermostats in Plano and the surrounding areas, ensuring complete customer satisfaction.
Ready to start saving and enjoy superior comfort? Schedule Your Thermostat Installation Today with Elite Air Texas. Your more comfortable, efficient home is just one appointment away.

Ready to Enhance Your Comfort?
Contact our experts today to discover tailored HVAC solutions that fit your needs perfectly.

